Best Tips For Macro Flower Photography (Amazing Images!)
Learn how to take beautiful and artistic macro flower photography with these tips!

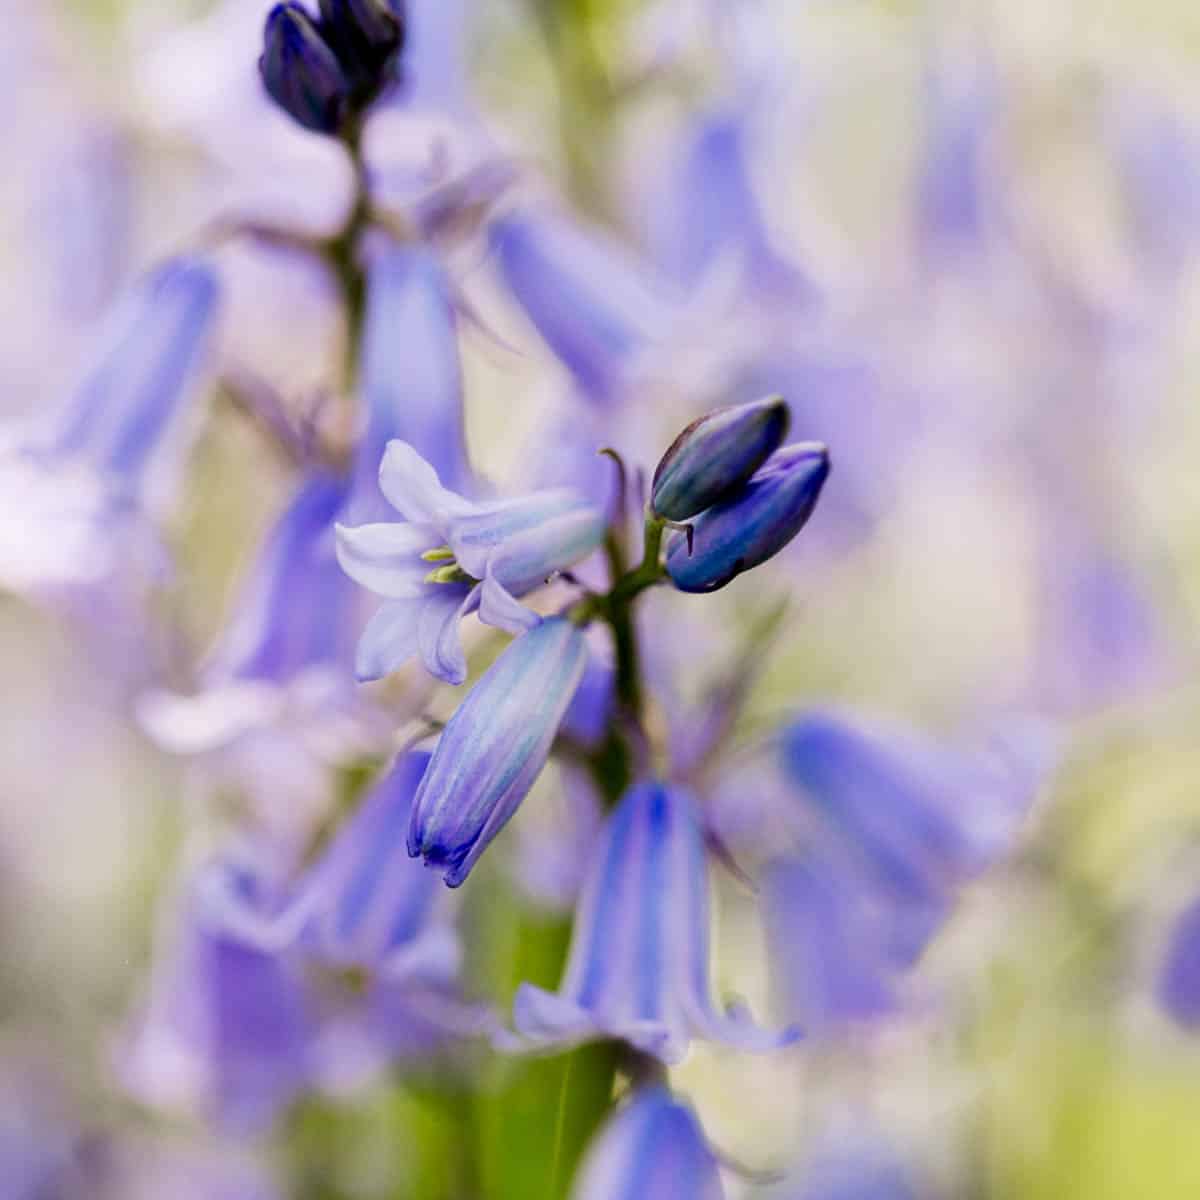
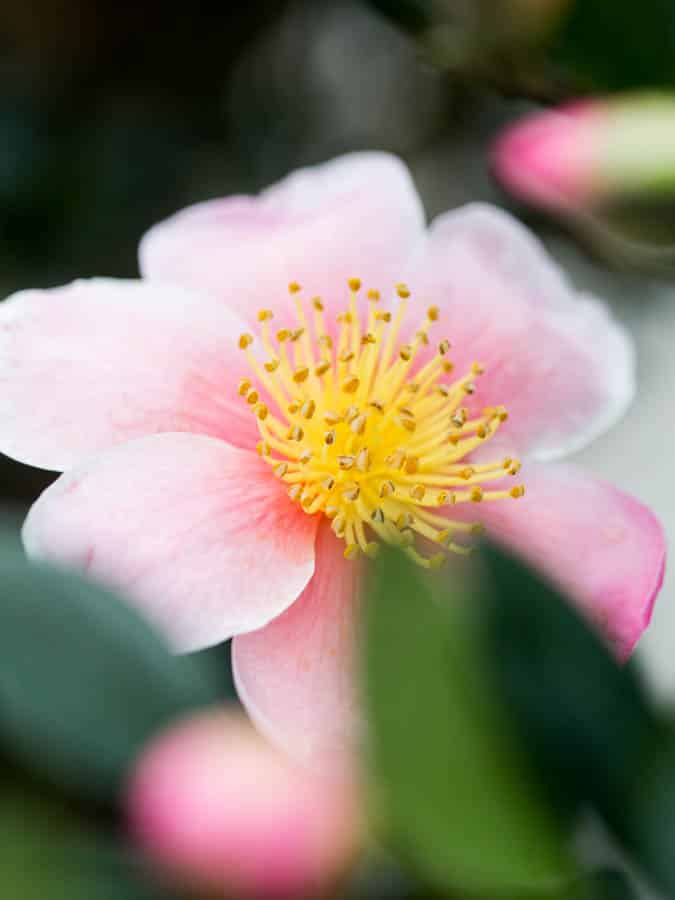
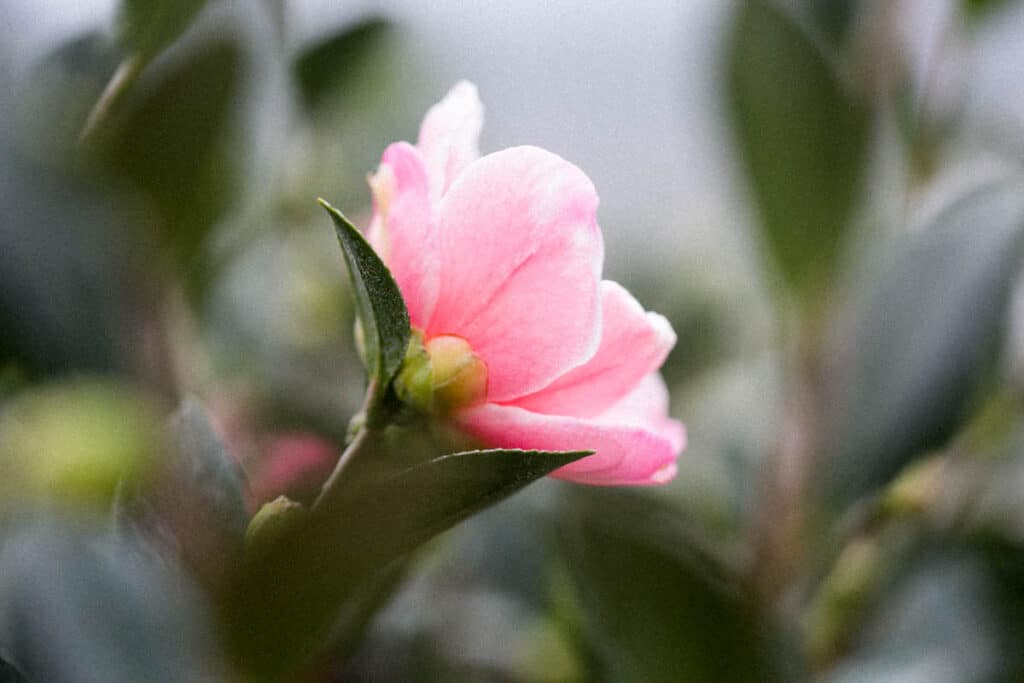
Macro photography allows you to explore the beautiful world of flowers in a unique and up close way. How else can you get this close to a hungry little mason bee as it visits a flower head for nectar? Or experience the magnificent, tiny drops of dew on the petal of a rose?
Nature photographers know the secret lies in the camera lens, the light, and the artist’s ability to find a unique angle to showcase the flower’s beauty.
The result of macro photography: stunning photos that reveal the secret world of flowers.

As a professional photographer and life long gardener, I’m here to show you how to take fantastic macro photos of flowers. Close-up flower photography does not have to be hard, but you will need to practice to get better results!
With some simple photography tips and a little practice you’ll soon be taking gorgeous up close photos of flowers.
This post contains affiliate links. If you click through and make a purchase, we may make a small commission at no extra cost to you.
How To Take Macro Flower Photos: The Basics
In order to take gorgeous up close flowers of photography, you’ll need a few skills and the right equipment:
Good light: Bright natural lighting is essential when photographing flowers and plants! Whether you have bright sunlight or overcast rain clouds, learning to use the existing light is essential for higher quality macro photographs.
Great composition: Composition refers to the way the elements are arranged within the frame of the picture. The rule of thirds is an example of composition. Strong composition makes an image compelling and easy to understand.
The right equipment: Flowers are small subjects! In order to take the best photos of plants, you need a quality macro lens and a DSLR camera. A macro lens will allow you to take gorgeous flower photos at a close range.
The right settings: Learning to shoot in manual setting will give you the most control over your macro photography.
An artist’s touch: As your photography skills grow you’ll be able to experiment with different angles, depth of field, composition and light! The skills you have developed with collide with your unique artistic eye. This will allow you to create flower photos that have a style all of their own. How you use your macro photography skills is totally up to you!

These are the 5 components that go into a creating beautiful photos of flowers. Keep reading to get all the details.
Equipment For Macro Flower Photography
I recommend using a DSLR camera and a macro lens when photographing flowers. This combination will allow you to adjust your camera settings manually, manual focus if desired, and get close up details of the flowers you are documenting!
Lenses
Macro flower photography is best accomplished with a dedicated macro lens attached to a DSLR camera body. Macro lenses allow you to photograph the flower up close, with a 1:1 ratio. This means that the object you are photographing is displayed at the same size as the camera sensor.

Macro lenses allow you to take photos of dew drops and nectar, allowing you to capture even more than what meets the naked eye! A high quality, true macro lens will help you capture as much detail as possible.
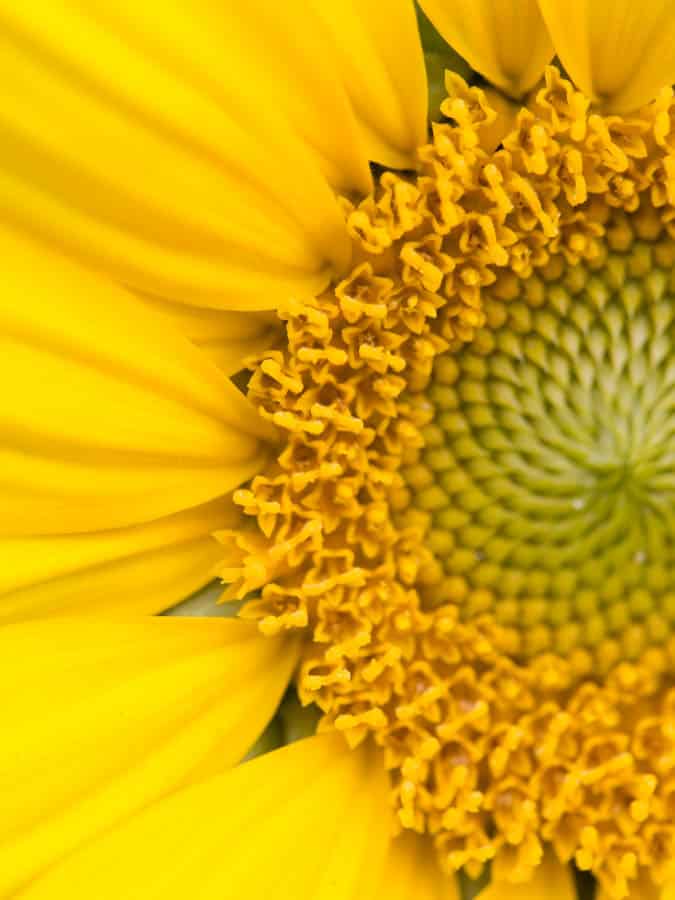
These specialized lenses will greatly enhance your close-up photography because you will be able to get much closer to your flower and the small details hidden within. The right lens will allow for close up nature photography, like this bee hovering on a sun flower petal!
A macro lens will give you the ability to photograph flowers at their real size-or even larger, depending on how close you get to your subject.
These specialized lenses allow you to focus at a shorter distance then regular portrait lenses. Because of this, small objects can be captured in sharp focus, resulting in stunning macro images.
We highly recommend the 100 mm f/2.8 Canon USM fixed lens. This lens is inexpensive, easy to use and incredibly sturdy. I have had my Canon 100 mm macro lens for over a decade- and it is still going strong!
If you are a gear junkie or passionate macro photographer, you may want to invest in the L series 100 mm lens, which features vibration reduction. The L series Canon lenses are generally superior to the consumer grade lens, but they do cost a pretty penny.
A major benefit of the 100 mm macro lens is it’s incredible versatility. This lens not not only takes beautiful macro photography, it can also be used for portraits as well!
As a cost effective alternative to a macro lens, extension tubes can be used. I personally prefer using the 100 mm macro because of the quality and durability. Canon is a reputable brand that produces sharp, colorful, vibrant images.

Best Digital Cameras For Macro Flower Photography
To have full creative control, choose a quality DSLR camera for your macro flower photography.
A DSLR camera will allow you to choose your focal point, shoot in manual settings, and change lenses whenever you want! While a DSLR camera will not automatically make you a fine art flower photographer, it will help you get the best results from your photography efforts.
Learning to shoot in manual on a DSLR camera is one of the first steps to mastering close up flower photography.
When choosing a DSLR, you can purchase either a full frame camera or crop sensor camera. I have used both and can with confidence recommend the Canon Rebel series, as well as Canon 5D Mark III.

Visit a local flower garden to practice your photography skills. We enjoy the Portland Rose Garden!
Find The Best Light For Macro Flower Photos
The most important part of flower photography (and any photography for that matter), is great lighting.
You can have the best equipment but if you do not understand how to find quality light you will not be able to create stunning photos! Learning to understand and use light well will allow you to produce exquisite flower photographs.
Flowers are often photographed with natural light as opposed to artificial light. For the sake of keeping things simple we will focus on natural light sources only here. Lighting is always affected by the time of day and the location.
Different Types Of Natural Light For Macro Photography:
- Early morning light (sunrise). Early morning light will give you soft, easy light to work with. Place your flower so that the light is behind the plant (in the morning this would be from the east). This will ensure there are no harsh shadows on the petals of the flower.
- Sunset Light (golden hour). The last two hours of daylight always give the softest light with the most beautiful glow. Sunset is often referred to as “golden hour” because of the beautiful soft light available. When used correctly, this light will gently wrap around your flower, creating a beautiful glow around your subject.
- Overcast Lighting (clouds). Did you know a cloudy day provides the best type of light for flower photography? You won’t need to worry about harsh shadows and the light will be even and easy to work with. This is because the light is being diffused through the clouds above. Just make sure you photograph your flowers early enough in the day. Lack of light can be a problem in the late afternoon on overcast days (especially in winter).
- Direct sunlight (mid day). Photographing flowers in the middle of a sunny day is challenging, but it can be done. Position yourself so that the light is still slightly behind your flower. This will prevent harsh shadows on your main subject. (When shooting on a bright sunny day, you can also look for shaded areas to photograph in, allowing for lighting that is much more gentle!).

- Window light: Like overcast lighting, window light can provide a gorgeous even light source for flower photography. To take advantage of this kind of light, make sure to position your flower out of any direct beams of light that are streaming through windows. Look for areas near a window that receive bright ambient light (bright light that is not direct).
Getting enough light and the right quality of light is important when photographing flowers with a macro lens. This is because you need to have a lot of light to keep your shutter speed fast, preventing image blur.
If you don’t have enough light and you slow down your shutter speed to let in more light, you can end up with camera shake and blurry photos.
This can be countered by a tripod, but I love to travel light! So, I adjust my settings so that I don’t have to deal with camera shake. Keep reading to find out how to shoot in manual mode while photographing flowers.
Learn How To Shoot In Manual
Learning how to shoot in manual is an essential skill when photographing flowers! Shooting in manual means that you adjust the shutter speed, aperture and ISO settings on your own (as opposed to the camera reading the light and shadows and adjusting).

These three tools on your camera accomplish different tasks but work together to let light in to your camera.
Shooting in manual will give you creative control over the outcome of your photos.
By manually adjusting my camera settings I can create a bright and airy look to my photographs. I do this by placing the light source behind the flower, then over exposing the photograph a little bit by slowing down my shutter speed or increasing my ISO. The resulting image is bright, light and romantic-the key elements to my personal photography style.
Keep in mind that shutter speed, ISO and aperture all work together to let in light. They have other purposes as well, as we dive into here:
Shutter Speed
Shutter speed refers to the amount of time the “shutter” is open, exposing the sensor within to light. In actuality, it’s a little more complicated than that, but when taking macro photos you can think of it as simply how fast or slow the shutter is moving when the photo snaps!

The faster the shutter speed, the easier it is to take photos without a tripod. A fast shutter speed has a smaller fraction number (1/500th, 1/100th etc).
This is because the sensor is not being exposed for very long… in fact the shutter is opening and closing very quickly! The faster the shutter speed, the easier it is to take a sharp image.
Shutter speed is simply how fast the shutter on a camera opens and shuts to let in light. A slow shutter speed can pick up slight movements from the photographer. And a fast shutter speed helps minimize any camera shake. The smallest movement can often be picked up by a slower shutter speed, affecting the quality of the final image. This is especially true when using a longer macro lens.
If you can keep your hands steady and your shutter speed fast, you can avoid using a tripod.
A slow shutter speed means that the shutter is open and allowing the sensor to capture light for a longer period of time. A slower shutter speed may need to be used when there is very little light left, or when a long exposure showing movement is being made.
Think of waterfall photos where the flow of the water seems to be captured. This is done with a slow shutter speed (and a tripod!). When photographing a moving subject, speed can be illustrated with a slow shutter speed.
Since flowers are static subjects you typically do not need to worry about movement photos, unless you want to capture some beautiful butterfly wings in motion!
I love this accidental portrait of a bee I captured with a slower shutter speed:

Because I’m a busy mom always on the go with 4 little kids, I never use a tripod. This means I need to keep my shutter speed fast in order to keep images sharp. I try to keep my shutter speed at 1/320 or faster when photographing flowers.
Over the years I have learned to keep very still when taking macro photos of flowers, helping to eliminate camera shake. It can be totally normal to use a tripod when photographing with a macro lens- I just prefer to work around it!
Aperture
The aperture is the hole or opening on the lens in which light passes through when taking a photograph. The size of this hole can be adjusted and is referred to in f stops: f/2.8, f/5.6, or f/22 (etc).
A larger number means the opening on the camera is smaller. This lets in less light but allows for more of the photo to be in crisp detail. A smaller aperture number means the opening within the camera is bigger (referred to as a wide aperture). This results in a shallower depth of field and allows you to let in more light.
I will often photograph flowers with a wide aperture of about 2.8-4.5, focusing on the main subject and allowing the background to become a beautiful blur. The painterly looking blur in the background is often referred to as a “bokeh”.
The shallow depth of field that causes the bokeh is a popular artistic choice in photography, and can result in stunning images that look like paintings.
For less detail but a more dreamy artistic look to your photos, use a wide aperture of 2.8-4.5. For realistic flower photos with lots of detail, use a smaller aperture number, such as f/8.
Pro Tip: Before transitioning to shooting in manual mode, practice in aperture priority for a while. This will allow you to experiment with aperture settings and see the results- without having to worry about adjusting shutter speed or ISO.
ISO
ISO originally referred to the amount of light a specific roll of film would be able to absorb, or it’s ability to gather light.
In digital photography, ISO refers to how sensitive the camera’s sensor is. The ISO can be adjusted to a higher setting to be more sensitive, meaning that the sensor absorbs more light (ex: ISO 800). Or, it can be adjusted to absorb less light (ISO 100).
The higher the number of your ISO, the more light the sensor can absorb.
The lower the number of your ISO, the less light your sensor can absorb.
The ISO can be manipulated alongside the shutter speed and aperture to help you get the desired look of your photo. For example, if you are photographing flowers in the evening and and the photo needs more light, you can increase your ISO. This will allow you to keep your shutter speed fast and still absorb more light.
The higher the ISO, the more grain that will be in your resultant image. Grain refers to tiny circles in the image that look like a texture over the top of the photo. This may be the artistic look you are going for! But if not, watch your ISO settings to prevent excess grain.
Shooting in manual and understanding your camera settings takes time and practice. Luckily, macro flower photography is a great way to practice your photography skills and gain confidence. Flowers are good subjects: they stay in one place and look beautiful without any extra work from the artist!
Composition For Macro Flower Photography
Composition refers to the way the elements within a photograph are arranged in the frame. Think of it as the way each photographer chooses to see the world and frame it within the photo.

Developing a good eye for composition will allow you to go from simply snapping a photo to creating art! Composition ultimately helps the viewer respond emotionally when they view the photograph. Great images have intention and thought to the composition.
Here are a few tips for composition when photographing flowers at the macro level:
- It may sound too easy, but the rule of thirds can be used to direct the eye to what’s most important in the photo. Use the rule of thirds to your advantage when photographing flowers up close.
- Look for leading lines when framing your macro shot- these lines will help guide the viewer throughout the image.
- Don’t underestimate how color can affect an image. Color strongly impacts how the image feels and what message is conveyed.
- What you leave OUT of the composition of your photos is just as important as what you include! Keep the photograph simple for a profound impact.
- Balance out your photo by removing elements that are distracting or heavy. The best photographers keep only the most important elements in the frame.
- Think about how the LIGHT is affecting your composition. You can use light to highlight a flower, draw attention to a subject, and create a specific mood. Light is powerful!
- Negative space refers to an area of a photograph that is empty or one solid color. Negative space can communicate to the viewer what elements are important in the image.

These are just a few tips for composing excellent macro flowers of photos. I love this article that dives even deeper into the elements of composition for photography!
Macro Flower Photography Tips
Now that we’ve covered the technical aspects of photography, here are 10 quick tips that will allow you to take your macro flower photography to the next level:
- Study light and watch how it affects your flower photos! Photograph flowers during the “golden hour” – the last hour of light in the early evening. This will give your flower photos a beautiful, soft glow.
- Carry a spray bottle with you to create the look of fresh rain that left water droplets on your flowers.
- Photograph flowers on an overcast day for beautiful, even light
- Practice, practice, practice! The more you practice macro photography the stronger your skills will become. Grow your own flowers so you can practice on all kinds of blooms. (Learn how to flower garden here).
- Place some flower stems or leaves partially in front of the camera lens. This will create a beautiful and unique foreground bokeh- an artistic way to frame your subject.
- Use the rule of thirds to create an image that is easy on the eye. To do this, place your main subject in one third of the photo. This can be on the left, right or center of the photo.
- Don’t be afraid to use a tripod if you need to!
- If you aren’t the tripod type, use this quick workaround: bring your elbows in close to your body and keep your legs staggered to support your camera. Breathe out before taking a photo-and hold very still! The steadiness of this photography posture helps take macro photos without a tripod!
- Grow some cut flowers and practice photographing them inside. Photographing flowers inside will challenge your photography skills- and increase them!
- If you don’t have enough light, use a reflective surface such as a white sheet or a photography reflector. The white surface will bounce light back onto your subject!
Becoming A Macro Flower Photographer (Explore The Art!)
Once you’ve learned the basics of finding good light and shooting in manual, you’ll be able to express yourself artistically through macro flower photography. Composition, editing, camera settings and creativity combine into unique pieces of art!
A single flower can be transformed into a beautiful work of art- all with your unique perspective and artistic touch!
The sky is the limit on how you personalize your photographs. Some artists will use flower photography to create colorful abstract art while others want to use their camera to document flowers and showcase the beauty of a real life garden.
Either way, you’ll end up with gorgeous images that you can share with friends and family, (or sell). As an added bonus, flower photography is relaxing and therapeutic!
FAQ’s
If you want to take up close photos of flowers, a macro lens is best. You can, however use many other lenses to take photos of flowers, such as a 50 mm portrait lens or an 85 mm portrait lens. The macro lens will allow you to take very up close photos of the flower!
The most important setting when photographing flowers is the shutter speed. Keep your shutter speed around 1/500 second. From there, adjust your other settings to work with this shutter speed! If you use a tripod or have a steady hand, you may be able to get away with a slower shutter speed without camera shake.
The 100 mm lens is the most ideal macro lens for photographing flowers.
Final Thoughts
A hidden world of beauty, mystery and creativity is available to those who choose to photograph flowers. We hope these tips on macro flower photography have helped you grow your photography skills.
Please let us know in the comments if you have any specific questions on capturing flowers with a macro lens!