How To Repot Spider Plants (Easy Repotting Guide)
Are you a spider plant lover like us? Then you’re in the right place! Learn to repot your spider plants with our simple step-by-step guide!
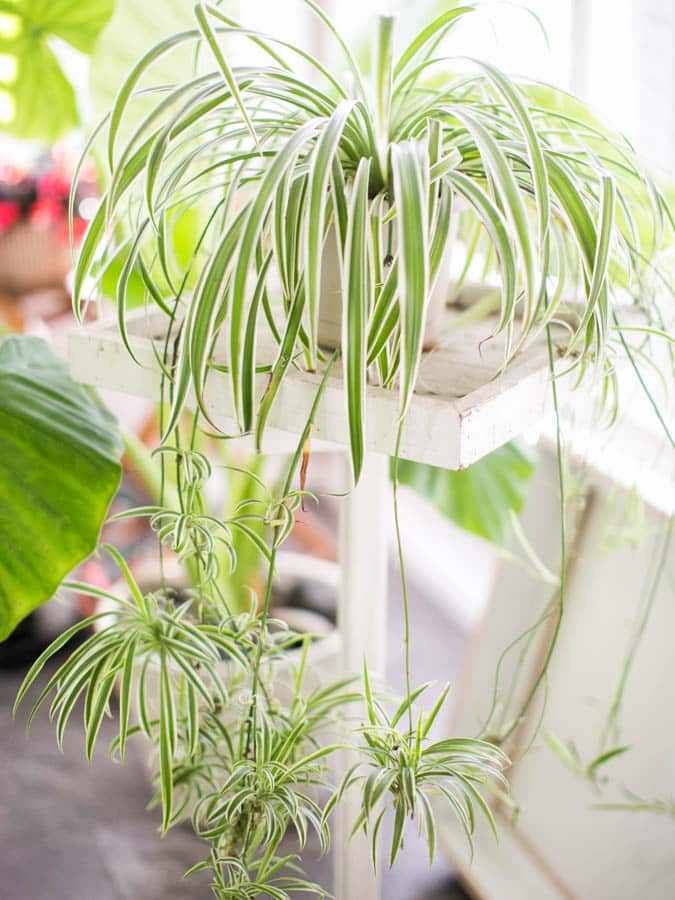
With their long, elegant leaves and ability to self-produce babies by the dozen, spider ivy are among the most popular houseplants. Also known as airplane plants, these emerald beauties are easy to maintain and fast-growing!
We love these long-leafed houseplants and think they are the perfect friends to tuck into the cozy corners of your home.
Though they are incredibly resilient, there is a time and place to re-pot your spider plant. They like to be root-bound, but once those roots start to peak out the bottom or over the sides, it’s time to give that baby a new home.
In this guide, you will learn how to transplant your spider plant into a fresh container and when to do so, all with step-by-step photos to help you through the process!
This post contains affiliate links. We may receive a small commission if you purchase through them. Thank you!
About
Referred to in Latin as Chlorophytum comosum, spider plants are also commonly known as airplane plants, ribbon plants or spider ivy.
Due to their resilience and unique beauty, these houseplants are trendy among new houseplant enthusiasts.

They grow in a mounding habit and the mother plant sends out long shoots on which baby spider plants grow. These vibrant green babies strongly resemble creeping little spiders (thus the name!).
They are very easy to propagate in water.
Originating from South Africa, spider plants have fleshy roots that store lots of water and tolerate neglect. Many careless gardeners have seen droopy spider plants perk up right away upon watering – these plants are really pretty flexible.
These tropical plants thrive in bright, indirect light and moderately high humidity. They make a great addition to a well-lit bathroom.
Though they thrive when root-bound, spider plants occasionally need to be upgraded to a larger pot. The container must have holes in the bottom to drain excess water, and the soil medium needs to be rich but well-draining.
Keep reading to learn how and when to repot these vibrant indoor plants.
Hey there! If we haven’t met, my name is Jamie. I’m a life long plant enthusiast with a background in environmental science. So glad you are here!
How Do You Know When A Spider Plant Needs Repotting?
Spider plants love to be root-bound, so figuring out when to re-pot them can be confusing. The top signs to look for are roots growing out of the container’s top or bottom or a plant pushing up and out of the soil.
In addition to an overgrown root system, keep an eye out for stunted plant growth and root disease, which are signs that the plant needs to be given fresh soil and a larger home.

Here’s what to look for in detail:
- Over-grown roots: The top sign that your plant needs re-potted is an overgrown root system that can be seen on the soil line or peeking out of the bottom of the pot. At the soil surface level, roots may be growing over the edge of the pot, and the plant may be growing up and out of the container.
- Stunted, slowed growth: Generally speaking, spider plants grow rapidly. Old soil that is depleted of nutrients AND a container that is too small can slow their growth. This stunted growth is a sign your plant needs a new container.
- Root rot: Like many other plants with tuberous roots, spider plants are prone to root rot. If detected, re-pot the plant immediately to prevent further infection to your plant’s roots. When re-potting, ensure you cut out all the affected roots that are mushy or rotten. If you don’t, you risk spreading the infection into the new soil.
When to Repot your Spider Plant
The best time to transplant your spider plant is during the warmer months of spring and early summer, when temperatures are warm and the houseplant is in its natural growing season.
If root rot is suspected, you’ll have to remove your spider plant from its container and re-pot it immediately.
Outside of rot, the best time to transplant is when the spider plant is actively growing during the warmer months. Since the plant has active growth, it will settle into it’s new container and quickly establish its roots.
Re-potting can be a little traumatic for the plant as they can’t stand having their roots exposed to the air, and spider plants can even experience shock from having their roots out of the soil.
Typically, however, these resilient plants bounce back quickly and adjust within a few days. The warmer weather and actively growing roots provide a gentle transition for these houseplants.
Size and Type Of Container When Transplanting
Choosing the right container size is essential when repotting a spider plant. The material that the container is made from is also important.
Opt for a slightly larger pot which will provide ample space for the roots to spread and encourage healthier growth. The increased soil volume will also help maintain higher moisture levels, reducing the need for frequent watering.
The new container should be just one size up in volume.

Clay and plastic are the most popular container materials. They each have pros and cons:
Clary or terra cotta pots offer breath-ability. The quick evaporation of water through the porous material helps to prevent over-watering.
Plastic pots retain moisture well as water can not evaporate quickly through the sides of the pot, just through the top of the soil.
Regardless of what material you choose, ensure the containers have drainage holes on the bottom to quickly drain excess water.
Regardless of the pot material, double-check to make sure there are drainage holes. Proper drainage will prevent water-logging and root decay. Elevating the pot slightly by placing it on pot feet will help with drainage.
Soil Needs for Repotting a Spider Plant
To re-pot your spider plant, use soil that is full of essential nutrients and has great drainage. Unlike some houseplants, spider plants are not picky about their soil.
But, they do need a potting mix that is full of essential nutrients like nitrogen, potassium and phosphorous, and the soil should have some drainage, like perlite, in it.
We are using Miracle Grow potting soil today.

How To Repot Spider Plants (Step By Step)
It’s helpful to have these tools on hand:
Step 1: Remove the plant from the container
This step can be simple if the plant is still living in loose soil, or challenging if the soil is compact and the roots are overgrown.
If the plant is root-bound, gently tap the bottom and sides of the pot to help loosen the soil and roots. Then, gently remove your spider plant, holding it at the base of the leaves. Never pull the plant from the pot by the leaves, as this can stress the plant and tear the foliage.
Removing plants from a plastic container is faster than a clay pot as you can squeeze the pot from the sides to loosen the roots. If you are having trouble removing the plant, gently run a knife along the sides of the inner container to loosen the plant.
Step 2: Inspect and trim roots

Once your plant is out of the pot, check the roots for any signs of disease or rot. Healthy roots are white in appearance and free of any slime or rot.
If you see any signs of dead or unhealthy roots, trim away the affected parts using clean, sharp scissors or pruning shears.
You can also trim off any excessively long roots at this point. Don’t worry, they will grow back! Do not cut more than a third of the root system, or you can risk putting your plant into shock.
If your plant is heavily root bound, it’s a good idea to pull the roots apart gently with your hands. This will allow the roots to grow outward in their new soil.
Step 3: Divide the plant
If you want more spider plants, this is the perfect time to split the plant into various sections that you can transplant. To divide, shake off excess soil, free up the tangled roots, and gently separate the sections from the main plant.
Take caution, though, not to damage the roots.
Step 4: Place plant in the new container

Fill the container about half-way up with fresh potting soil and set your plant in. Set the root ball about two inches below the top of the pot; you may need to add more soil or remove some to get your plant to the right height.
Next, fill the space around the roots with fresh potting soil while gently pressing it down to eliminate air pockets. Continue filling the potting mix as you press down until the plant can stand independently.
Take care not to compact the soil.
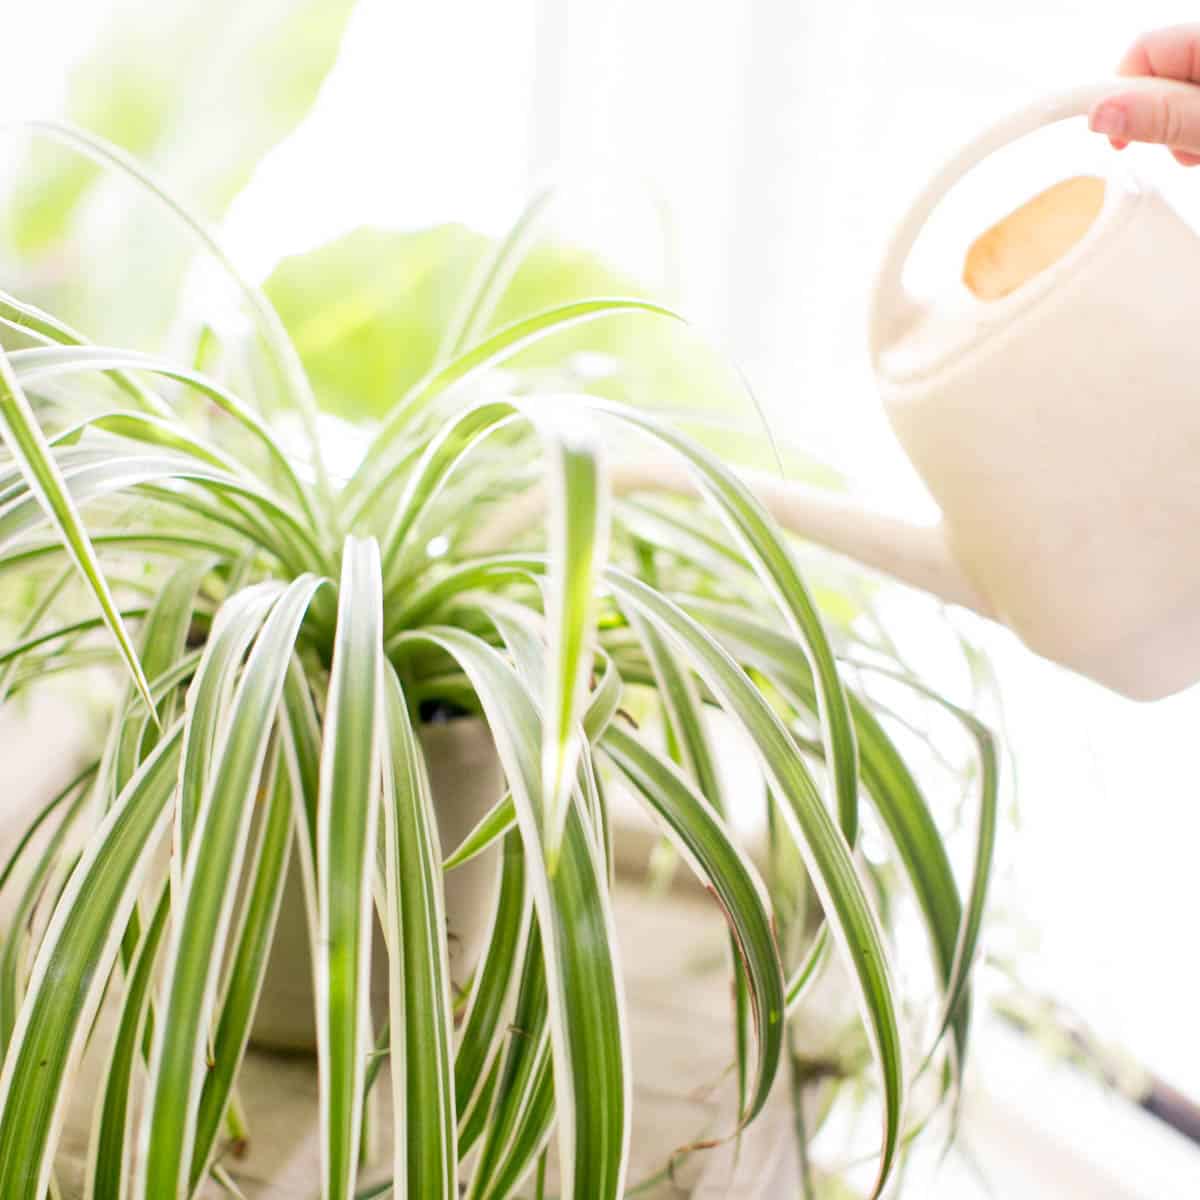
Step 5: Water thoroughly
Use a gentle stream of water and water your plant deeply until you see liquid streaming out of the bottom of the pot. Use a chemical free water source.
This much-needed moisture will help the roots settle in and allow the plant to quickly adjust to its new home!
Get our guide to watering established spider plants here.
You can soften the transition to the new environment by setting it the spider plant in a location with bright indirect light and moderately high humidity levels.
While spider plants are typically pretty flexible, this is not the time to shirk on watering! Check the soil every few days and give your plant a deep drink of water when the top two inches of soil is dry.
What Can Happen If You Don’t Repot Spider Plants?
Spider plants can endure some neglect, but poor soil and overcrowded roots can eventually damage your plant.
When a plant is in the same container for too long, you run these risk factors:
- Compacted soil does not drain well, creating a conducive environment for root rot and disease.
- Roots can grow excessively long and become overcrowded, limiting the plant’s ability to absorb vital nutrients.
- Eventually, the soil will run out of the vital nutrients your plant needs to thrive. This can lead to yellowing leaves and stunted plant growth.
- The limited space will deter the plant from producing the vibrant spider plant pups we all know and love
When To Replant Spider Plant Babies
Spider plant babies can be grown in water or soil. Once the spiderettes have a root system established, you can transfer them to small container.
Re-pot the baby spider plant when you see it overgrowing it’s container and roots coming out of the bottom of the container or the plant is pushing up and out of the pot.
Learn how to propagate baby spider plants here.